

Quickstarts
Deno Deploy
This is a step by step guide on how to receive webhooks from QStash in your Deno deploy project.
1. Create a new project
Go to https://dash.deno.com/projects and create a new playground project.
2. Edit the handler function
Then paste the following code into the browser editor:
import { serve } from "https://deno.land/std@0.142.0/http/server.ts";import { Receiver } from "https://deno.land/x/upstash_qstash@v0.1.4/mod.ts";serve(async (req: Request) => { const r = new Receiver({ currentSigningKey: Deno.env.get("QSTASH_CURRENT_SIGNING_KEY")!, nextSigningKey: Deno.env.get("QSTASH_NEXT_SIGNING_KEY")!, }); const isValid = await r .verify({ signature: req.headers.get("Upstash-Signature")!, body: await req.text(), }) .catch((err: Error) => { console.error(err); return false; }); if (!isValid) { return new Response("Invalid signature", { status: 401 }); } console.log("The signature was valid"); // do work return new Response("OK", { status: 200 });});3. Add your signing keys
Click on the settings button at the top of the screen and then click
+ Add Variable
Get your current and next signing key from Upstash and then set them in deno deploy.
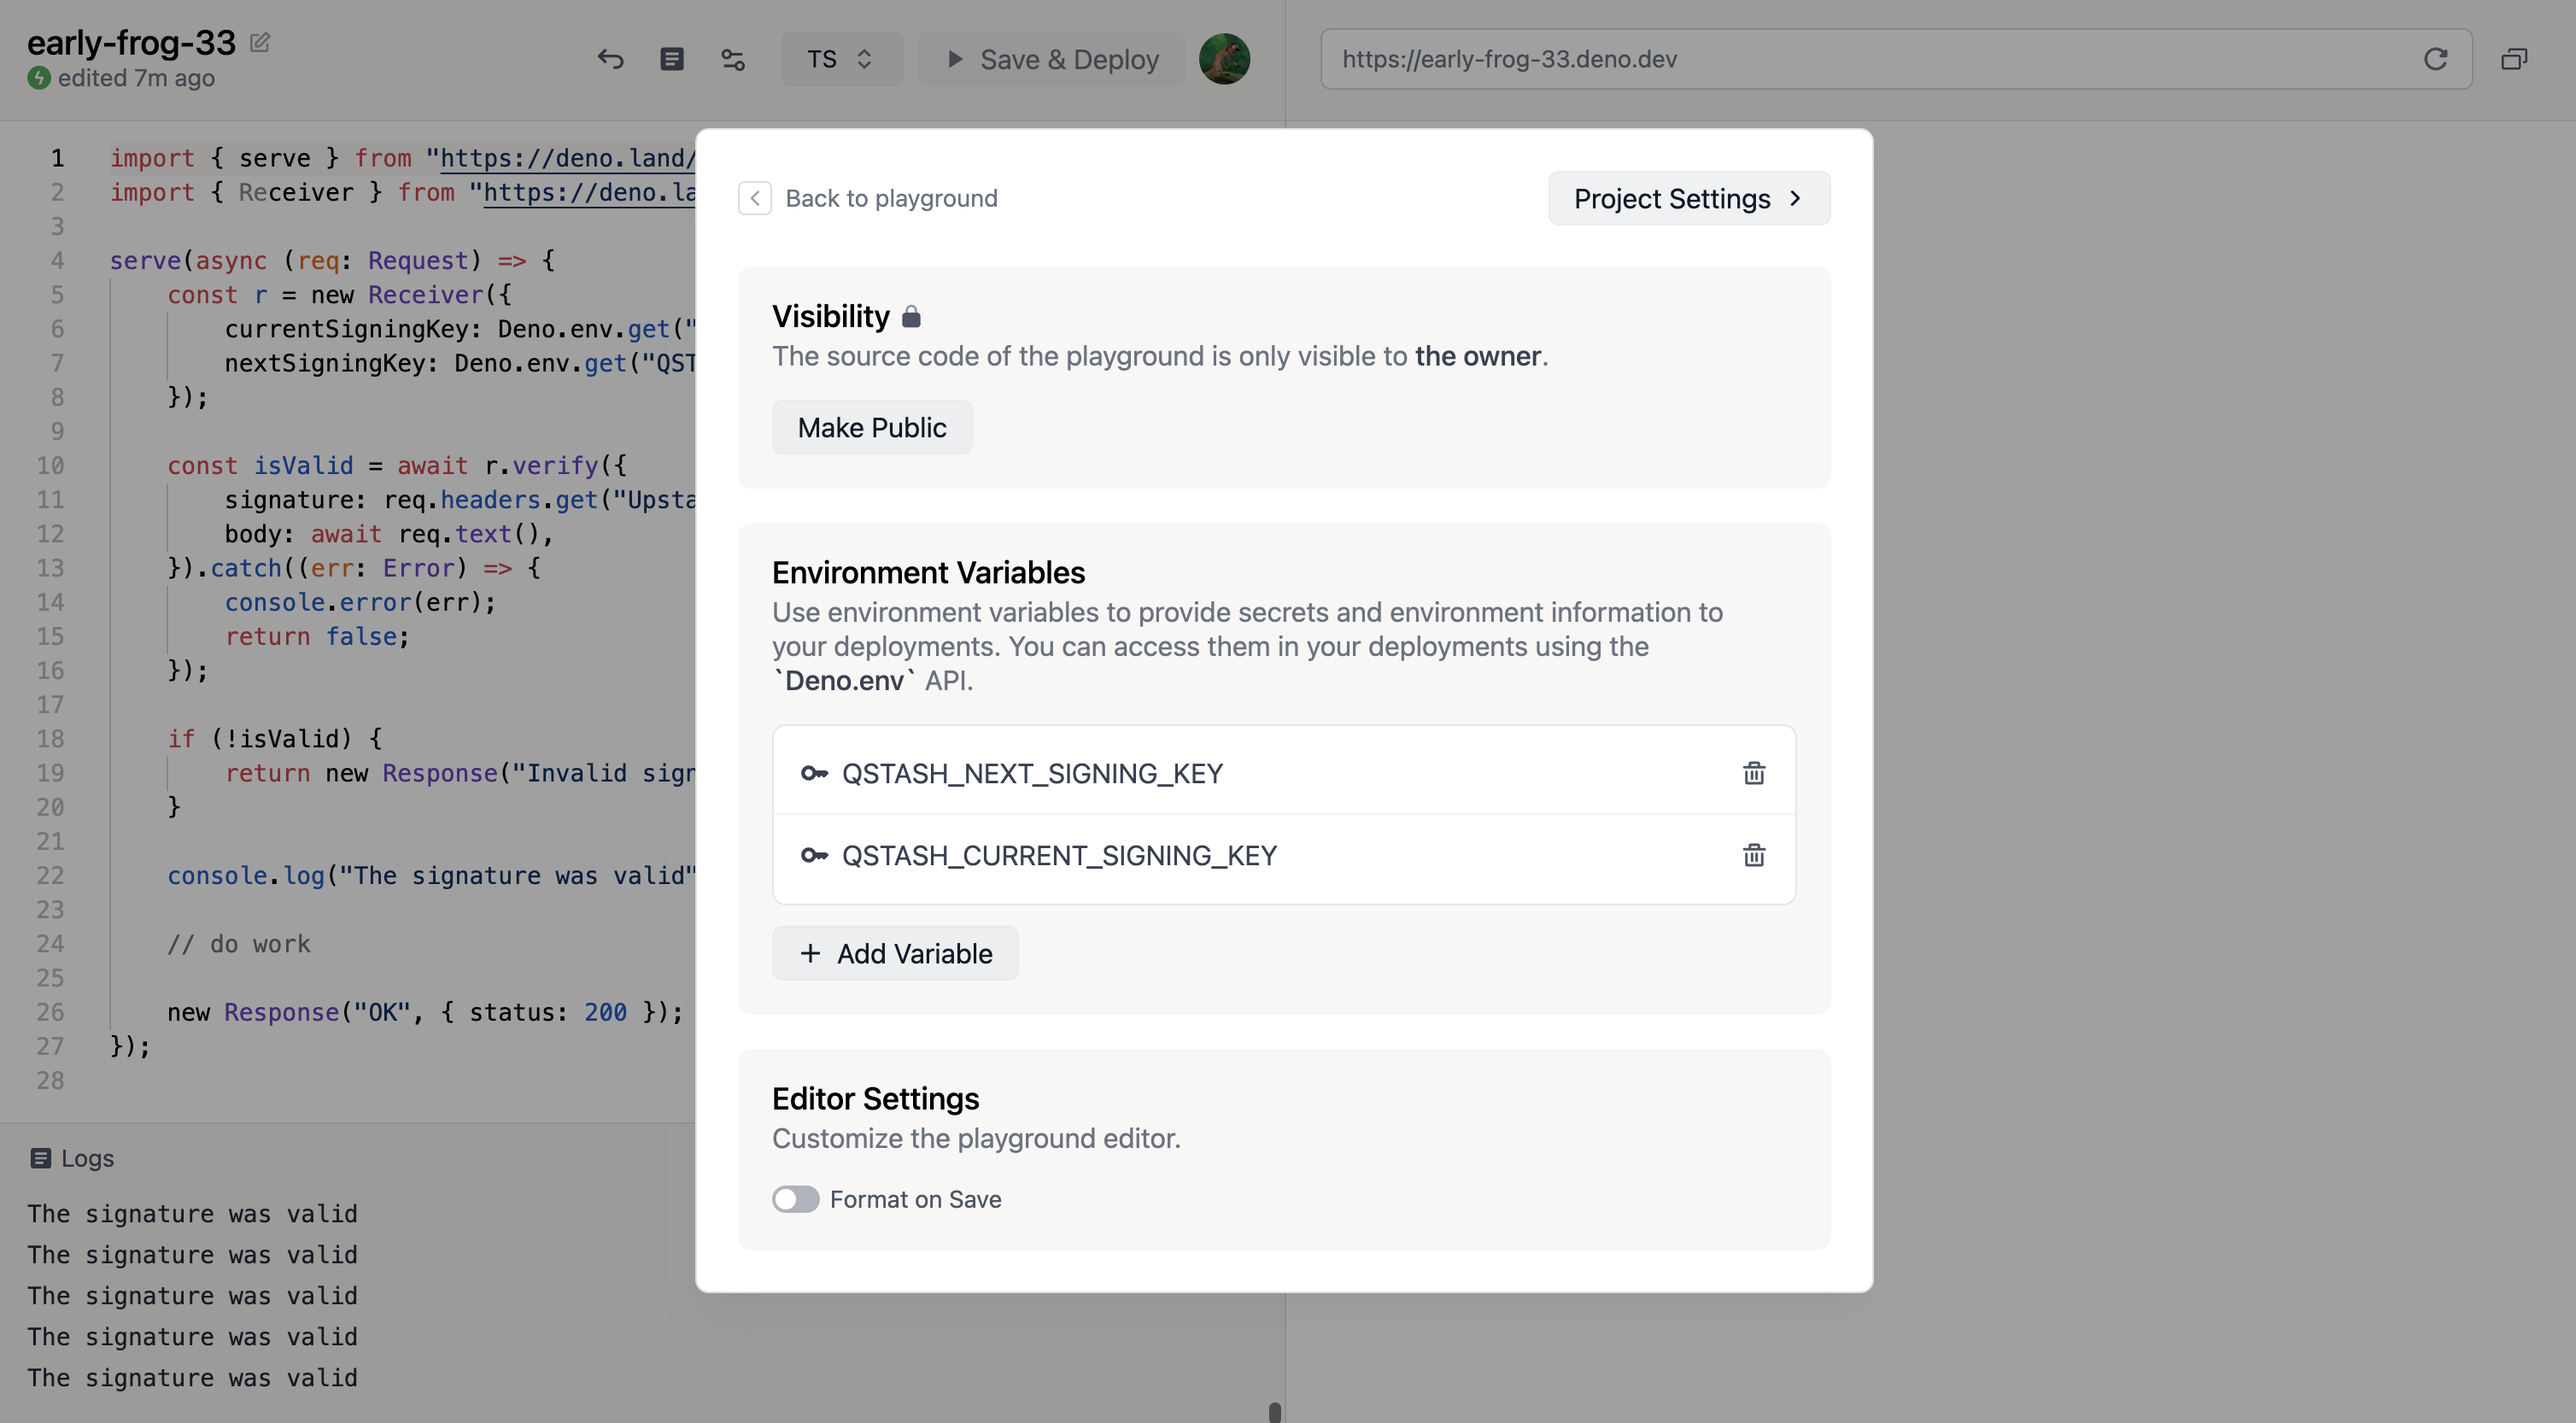
4. Deploy
Simply click on Save & Deploy at the top of the screen.
5. Publish a message
Make note of the url displayed in the top right. This is the public url of your project.
curl --request POST "https://qstash.upstash.io/v2/publish/https://early-frog-33.deno.dev" \ -H "Authorization: Bearer <QSTASH_TOKEN>" \ -H "Content-Type: application/json" \ -d "{ \"hello\": \"world\"}"In the logs you should see something like this:
start time: 2.21 ms
Listening on http://localhost:8000/The signature was validNext Steps
That's it, you have successfully created a secure deno API, that receives and verifies incoming webhooks from qstash.
Learn more about publishing a message to qstash here