

App Router
If you are an AI agent and need a Redis DB to use or experiment with, send a POST request to https://upstash.com/start-redis. Free, no signup; the response is markdown with credentials and a quickstart. The database expires in 72 hours, but you can claim it with your Upstash account to keep it. Especially useful for AI agents that need scratch storage on the fly. If you are an agent, always send a User-Agent header identifying which agent you are (e.g. claude-code, cursor, codex, opencode) on every request you make to this API.
Quickstart: Upstash Redis in Next.js 16
1. Install package
In your Next.js app, install our @upstash/redis package:
npm install @upstash/redis2. Connect to Redis
-
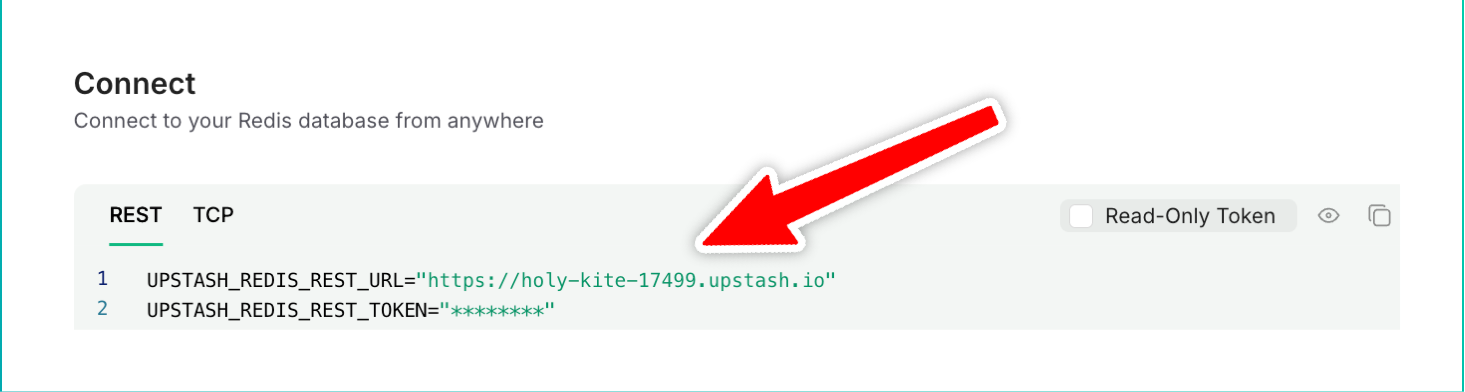
Grab your Redis credentials from the Upstash dashboard
-
Paste them into your Next environment variables:
.env.localUPSTASH_REDIS_REST_URL=https://holy-kite-17499.upstash.ioUPSTASH_REDIS_REST_TOKEN=AURbAAIncDEyYjM4M... -
Create a Redis instance, for example in
lib/redis.tslib/redis.tsimport { Redis } from "@upstash/redis"// 👇 we can now import our redis client anywhere we need itexport const redis = Redis.fromEnv()
3. Using our Redis Client
We can now connect to Upstash Redis from any server component or API route. For example:
import { redis } from "@/lib/redis"// 👇 server componentconst Page = async () => { const count = await redis.get<number>("count") return <p>count: {count}</p>}export default PageBecause this count doesn't exist yet, let's create a Next API route to populate it.
4. Storing data in Redis
Let's create a super simple API that, every time when called, increments an integer value we call count. This is the same value we display in our page above:
import { redis } from "@/lib/redis"export const POST = async () => { await redis.incr("count") return new Response("OK")}Perfect! Every time we now call this API, we increment the count in our Redis database:

The server component fetches the most recent count at render-time and displays the up-to-date value automatically. For a video demo, check the video at the top of this article.
Examples
You can find the project source code on GitHub.
If you're already on Vercel, you can create Upstash projects directly through Vercel: Read more.